

Why Use 3D Printing for Prototypes: A Practical Guide
Table of Contents
- What 3D Printing Means for Prototype Development
- How the 3D Printing Prototyping Process Works
- Benefits of 3D Printing a Prototype
- 3D Printing Prototype Materials and Their Applications
- 3D Printed Prototype Accuracy and Tolerances
- 3D Printing vs Injection Molding for Prototypes
- Choosing the Right Prototyping Method for Your Project
- Frequently Asked Questions
Last Updated: October 11, 2026
What 3D Printing Means for Prototype Development
Why use 3D printing for prototypes? Speed, cost, and control. 3D printing builds parts layer by layer from digital designs, letting you test ideas fast without expensive tooling or long lead times. At Socal3Dprintsdesigns, we help inventors, entrepreneurs, and hobbyists bring concepts to life using industrial-grade 3D printing combined with hand-finished detail.
Traditional manufacturing demands upfront investment in molds, fixtures, and specialized equipment. 3D printing skips that entirely, you print directly from a CAD model, and changes take hours, not weeks.
The real advantage is iteration: test a design, spot problems, modify the CAD file, and print again the same day, as many times as needed before committing to expensive production tooling.
How the 3D Printing Prototyping Process Works
First, create or refine a CAD model containing every dimension, feature, and detail. Export it as STL or similar format, the language 3D printers understand.
Next, choose your printer and material. FDM uses plastic filament (affordable and fast). Resin printers deliver finer detail. Metal printers handle extreme durability. Your choice depends on what you're testing.
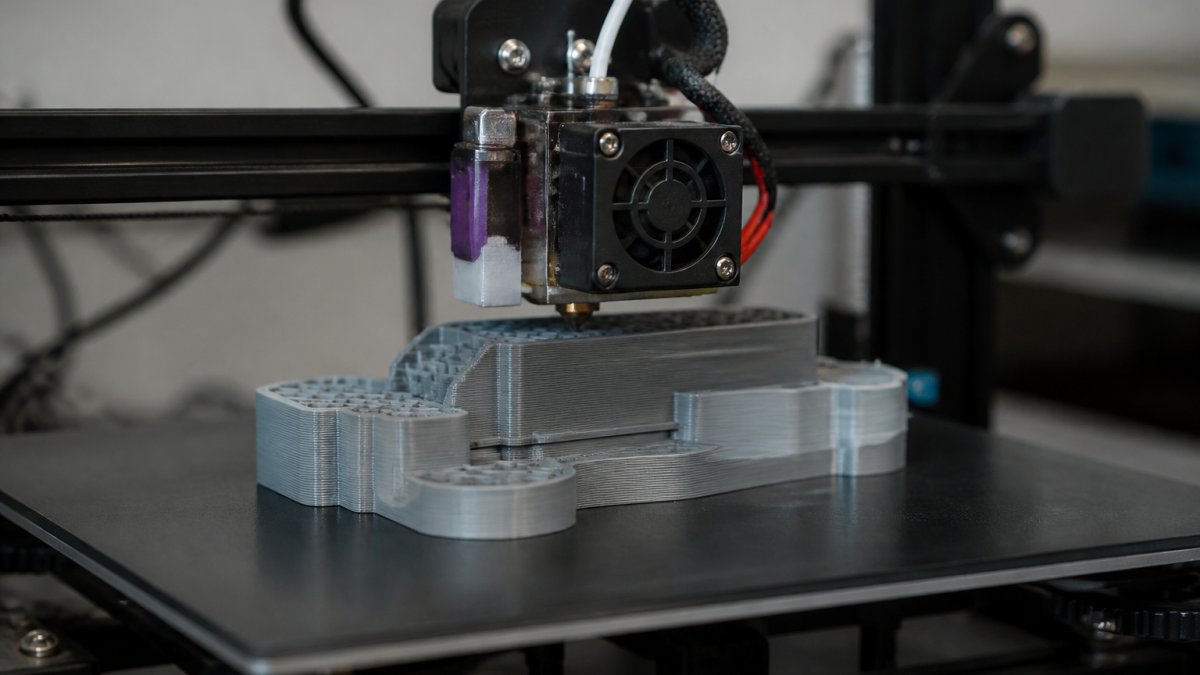
The printer builds your part layer by layer (hours or days depending on size and complexity). Post-processing follows: remove support material, sand surfaces, or apply finishing techniques. Hand-finished detail is the difference between a rough prototype and one that looks production-ready.
Finally, test: Does it fit? Function? Survive required conditions? The answers guide your next iteration.
Benefits of 3D Printing a Prototype
Faster Design Iteration and Validation
Speed is the biggest advantage. Cycle through designs rapidly: test, identify changes, update the CAD file, and print again.
Validation happens faster, catching design flaws before they become expensive. A fit problem in a 3D printed prototype costs nothing to fix; in injection-molded production, thousands.
Design iteration reduces risk by validating concepts with real, functional parts, not sketches or renderings. You hold, test, and know what works before moving forward.
Cost Efficiency and Reduced Tooling Costs
Traditional manufacturing requires expensive tooling: injection molds cost thousands upfront, CNC setups demand fixture costs. These expenses make sense only at high volumes.
3D printing eliminates tooling costs entirely, no mold, fixture, or setup costs. This makes prototyping affordable for small teams and entrepreneurs.
For custom parts or low-volume production runs, 3D printing often beats traditional manufacturing by avoiding the break-even point where tooling costs become justified.
Design Freedom and Geometric Complexity
3D printing removes manufacturing constraints: complex internal features, organic shapes, lightweight lattice structures, undercuts, and overhangs that would jam a CNC tool or require multiple molds.
This design freedom lets you optimize for performance, not manufacturing limitations.
3D Printing Prototype Materials and Their Applications
ABS plastic is durable and strong, handling mechanical stress. Socal3Dprintsdesigns uses ABS with acetone vapor treatment for bonding, creating solid-infill parts that survive repeated testing.
Resin delivers fine detail and smooth surfaces, ideal when appearance matters or finish affects perception.
PETG balances strength and ease of printing, handling thermal stress and chemical exposure better than ABS.
Metal printing handles extreme requirements, high heat, heavy loads, harsh environments, but costs more and takes longer.
Choose material based on your test: fit/form (cheapest option), durability (match final properties), appearance (smooth/clean finish), or stress (ABS or PETG).
3D Printed Prototype Accuracy and Tolerances
3D printers hold tolerances between 0.003" and 0.010" depending on technology, tight enough for most functional prototypes, fit testing, assembly validation, and stress testing.
Precision matters most in critical dimensions: mating surfaces for assembly testing and clearances require accuracy; general function testing tolerates looser tolerances.
Post-processing affects accuracy: hand-finishing improves surface quality, but aggressive finishing can creep into tight tolerances. Plan finishing based on test requirements.
3D Printing vs Injection Molding for Prototypes
For prototyping and validation, 3D printing wins: no tooling cost, design changes in hours, perfect for testing before committing to molds. For production, the calculation changes at volume. If you need 10,000 units, injection molding becomes cheaper per part despite upfront tooling. If you need 100 units, 3D printing is cheaper overall. Many companies use both: 3D print to validate, then mold for production once the design is locked.
Choosing the Right Prototyping Method for Your Project
Step 1: Define your test goal and prototype fidelity
Before choosing a method, be specific about what you're validating:
Yamaha G1 Golf Cart Starter/Generator/Alternator 4 Blade Fan →
- Visual/form prototype: Does the product look right? Does it communicate the design intent? This requires appearance fidelity but not functional fidelity. Resin 3D printing or hand-finished ABS is ideal. Lead time: Varies. Cost: Varies.
- Fit prototype: Do parts assemble correctly? Do clearances work? Do mounting points align? This requires dimensional accuracy but not material properties. ABS or PETG 3D printing works well. Lead time: Varies. Cost: Varies. Tolerance requirement: Varies.
- Functional prototype: Does the product work as intended? Does it survive real-world use? This requires material properties, durability, and performance matching the final design. 3D printing works if you match materials; CNC machining or metal printing if extreme conditions apply. Lead time: Varies. Cost: Varies.
Most projects need multiple prototypes at different fidelities. Start with a visual prototype to validate appearance and stakeholder buy-in. Then move to fit prototypes to validate assembly and geometry.
Step 2: Assess geometry and design constraints
3D printing excels at complex geometry. If your design includes:
- Internal lattice structures or hollow sections for weight reduction
- Organic or curved surfaces
- Undercuts or overhangs that would require multiple molds
- Integrated features that would normally require assembly
...then 3D printing is likely your best choice. Traditional CNC machining struggles with these geometries and requires expensive fixturing or multiple setups.
If your design is simple, flat plates, basic cylinders, straightforward features, CNC machining may be faster and cheaper.
Step 3: Compare lead time and iteration cycles
This is where 3D printing's advantage becomes clear:
- 3D printing: Design to tested part in 24-48 hours. You can iterate 2-3 times per week.
- CNC machining: Design to part in 3-7 days (including setup and programming). You can iterate once per week.
- Injection molding: Design to part in 4-12 weeks (including mold design, fabrication, and first-article inspection). You iterate once every 4-12 weeks.
If your timeline is tight, you need validation in days, not weeks, 3D printing is the only practical choice. If you have months, traditional methods may offer other advantages.
Step 4: Calculate total cost including iteration
This is where many teams make mistakes. They compare per-part cost without accounting for iteration and tooling.
Scenario: Validating a consumer product design with 5 iterations
3D printing approach:
- The cost and timeline for 3D printing prototypes are significantly lower than for injection molding.
Injection molding approach:
- Mold design and fabrication: $8,000-$15,000
- First article inspection and mold adjustments: $2,000-$5,000
- 5 prototype runs at 50 units each (to amortize mold cost): $2,500-$5,000
- Total: $12,500-$25,000
- Timeline: 8-12 weeks
3D printing is more cost-effective for validation. The injection molding advantage only appears at high production volumes.
Step 5: Assess material and performance requirements
If your prototype must prove material properties, strength, heat resistance, chemical compatibility, electrical conductivity, you need to match or proxy the final material:
- Plastic products: 3D print in the same plastic (ABS, polycarbonate, nylon). This validates fit, assembly, and basic durability.
- Metal products: 3D print in metal if the test requires it (thermal cycling, load-bearing, corrosion resistance). Otherwise, use strong plastic (PETG or nylon) as a proxy for geometry validation.
- Elastomer or flexible products: Standard 3D printing doesn't work well. Consider flexible resin or TPU filament, or use CNC-machined prototypes.
If material properties don't matter for your specific test, you're only validating geometry or fit, use the cheapest 3D printing option (ABS or PLA).
Step 6: Plan for design-for-additive-manufacturing (DfAM) constraints
3D printing has design rules that traditional manufacturing doesn't. Violating them wastes time and money:
- Wall thickness: Walls thinner than 0.8 mm are fragile and may fail during printing or post-processing. Walls thicker than 5 mm are wasteful and slow to print. Design for 1-3 mm walls where possible.
- Support material: Overhanging features require support structures that must be removed by hand. Complex supports add cost and risk damage. Orient your design to minimize overhangs, or accept the post-processing cost.
- Infill density: Solid (100%) infill is strong but slow and expensive. 20% infill is fast and cheap but weak. For fit testing, 20% works. For functional testing, use 60-80%.
- Anisotropy: 3D-printed parts are stronger along the print direction than perpendicular to it. Orient critical features (thin walls, stress points) parallel to the build platform to maximize strength.
- Tolerances: 3D printing holds 0.003-0.010" tolerances depending on technology. If your design requires tighter tolerances, you'll need CNC finishing or a different method.
If your design violates these rules significantly, very thin walls, extreme overhangs, tight tolerances everywhere, 3D printing will be expensive and risky. Consider CNC machining instead.
Decision table: When to use each method
| Scenario | Best Method | Why | Lead Time | Cost per Part |
|---|---|---|---|---|
| Rapid design validation (1-5 iterations) | 3D Printing | No tooling, fast iteration | Varies | Varies |
| Testing fit and assembly | 3D Printing | Speed and cost | Varies | Varies |
| Functional testing with matched materials | 3D Printing (material-matched) | Validates real performance | Varies | Varies |
| Consumer appearance feedback | 3D Printing (resin or finished) | Surface quality affects perception | Varies | Varies |
| Simple geometry, tight tolerances | CNC Machining | Can be faster than 3D for simple parts | Varies | Varies |
| Low-volume production (50-500 units) | 3D Printing | Cheaper than tooling | Varies | Varies |
| Medium-volume production (500-5,000 units) | Hybrid (3D print + mold) | Validate with 3D, then mold for volume | Varies | Varies |
| High-volume production (5,000+ units) | Injection Molding | Lowest per-unit cost | Varies | Varies |
| Custom or specialty parts (ongoing) | 3D Printing | Eliminates tooling barrier | Varies | Varies |
| Extreme conditions (heat, load, corrosion) | Metal printing or CNC | Plastic may not survive | Varies | Varies |
The hybrid approach: 3D print to validate, then mold for volume
Most successful product teams use both methods. They 3D print 3-5 prototypes to validate design, fit, and basic function.
Frequently Asked Questions
What are the main benefits of using 3D printing for prototypes?
3D printing accelerates product development by enabling rapid iteration, you can test design changes in days instead of weeks. It reduces tooling costs since there's no need for expensive molds or setup. You gain design freedom to create complex geometries that traditional manufacturing cannot easily produce. Additionally, functional testing and fit validation happen faster, letting you validate your concept before committing to full-scale production.
How accurate are 3D printed prototypes compared to traditionally manufactured parts?
Modern 3D printing achieves dimensional accuracy within typical industry ranges depending on the technology and material used. For design validation and fit testing, this precision is sufficient. However, if your prototype requires tighter tolerances for functional testing of mechanical interfaces, post-processing and hand finishing can refine surfaces and dimensions. Materials like ABS with acetone vapor finishing, as used in professional services, provide the strength and precision needed for real-world prototype testing.
When should you use 3D printing instead of injection molding for a prototype?
Use 3D printing when you need to validate a concept quickly, test multiple design iterations, or evaluate form and fit before investing in injection molding tooling. Injection molding makes sense only after your design is finalized and you're ready for production runs. 3D printing is ideal for low-volume prototypes, custom parts, and applications where lead times matter. For example, if you need a replacement part for a discontinued RV component or a custom golf cart accessory, 3D printing delivers in days with no tooling costs.
What materials work best for 3D printed prototypes?
ABS and PETG are popular choices for functional prototypes because they offer strength, durability, and resistance to environmental stress. Resin-based materials provide higher resolution for detailed parts. For prototypes that undergo functional testing or outdoor exposure, thermoplastics like ABS are preferred, they withstand vibration, temperature changes, and UV exposure. Choose based on your test requirements: cosmetic validation may use resin, while mechanical testing demands thermoplastics with solid infill for maximum strength.